Product Update Notice
We recently identified a manufacturing issue that affected a container shipment to Australia. We’re actively working with our distributor, Enviro Pro, to resolve this in a timely and thorough manner.

In response, we have:
-
Updated the design of the cog with a new, more robust drive style
-
Increased the glass fill content to enhance the strength and performance of the resin
-
Implemented torque and wear testing protocols to validate long-term durability
These improvements have proven highly successful in strengthening overall cog performance. If you're experiencing issues, please reach out to our customer care team. Be sure to include:
-
Proof of purchase
-
Your email and order number
-
If outside the U.S., the name of the distributor you purchased from
Our team is here to ensure you're supported and your system is running properly.
What You’ll Need
-
Phillips screwdriver
-
Replacement cog (contact us if needed)
-
Washer and bolt (reuse original unless damaged)
Step-by-Step Cog Replacement
1. Remove the old cog
Flip the solids bin upside down. Unscrew the bolt from the bottom and remove the washer.
Pull the agitator out. If the cog is loose, it may fall out. If tight, give a gentle pull to remove it from the hex coupling nut.
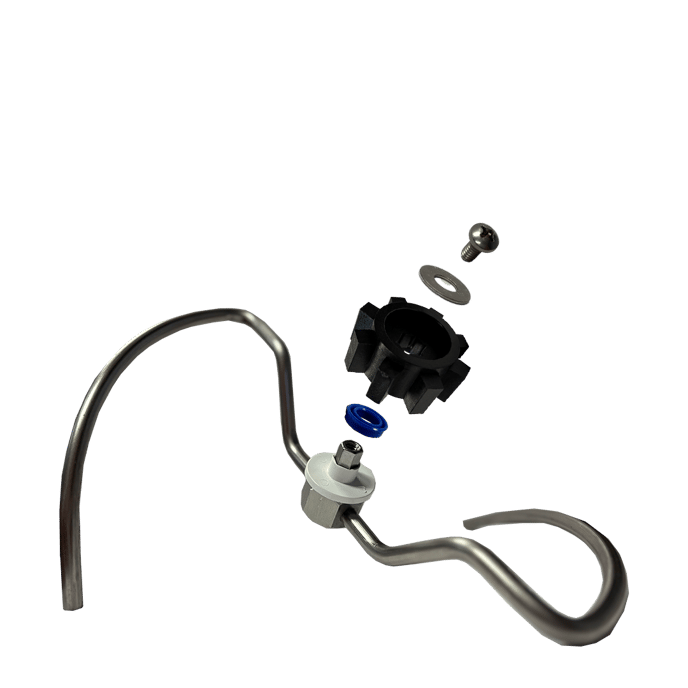
2. Reassemble in this order:
Top to bottom (refer to exploded diagram image for visual aid):
-
Bolt
-
Washer
-
Cog (recessed lip up, seated around the molded lip of the solids bin center, aligned with hex coupling nut)
-
Blue bearing ring (if included)
-
White bushing (flat side up)
-
Agitator shaft
Important: The cog should sit flush around the central lip inside the solids bin. This ensures smooth rotation and keeps the agitator properly centered. If the cog is not seated fully or is off-angle, it may cause friction or misalignment.
3. Secure and test
Hand-tighten the bolt until snug. Do not overtighten.
Manually rotate the agitator to check for free, unobstructed movement.
Need Help?
Our support team is ready to help with parts or questions. Please include your order info when you reach out so we can assist you quickly.