What You’ll Need
-
A 12V-rated LED light (any small unit will work)
-
Extra wire (enough to run from inside the base to your LED mount point)
-
WAGO clips or wire splicing tools
-
A 3-pin wire connector (optional, for cleaner connections)
-
Screwdriver and zip ties (for wire routing)
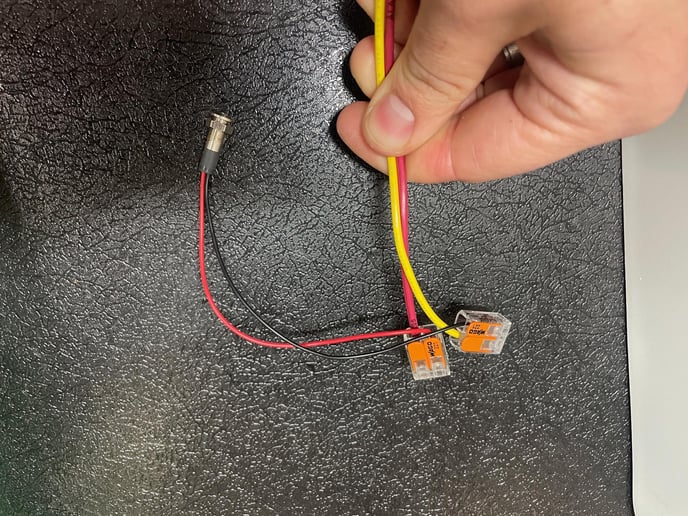
Step 1: Prep Your LED and Wiring
-
Grab your 12V LED and some additional wire.
-
Splice the wire to the LED—make sure the leads are secure.
-
Use WAGO clips (available at most hardware stores) to prep the connection ends.
-
Leave enough length in the wire to route from the bottom of the toilet to wherever you plan to mount the LED—inside or outside the unit.
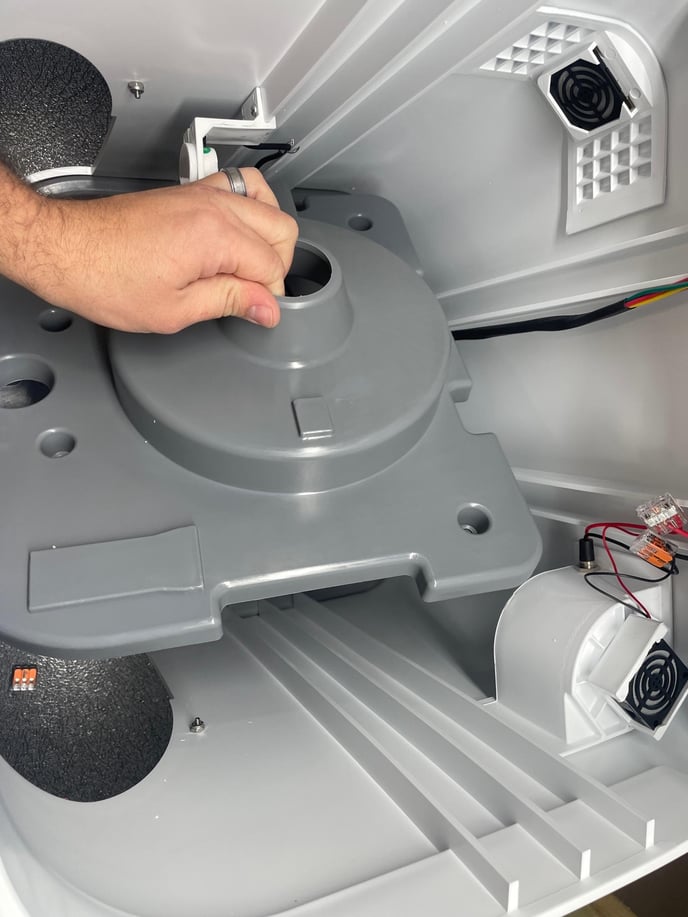
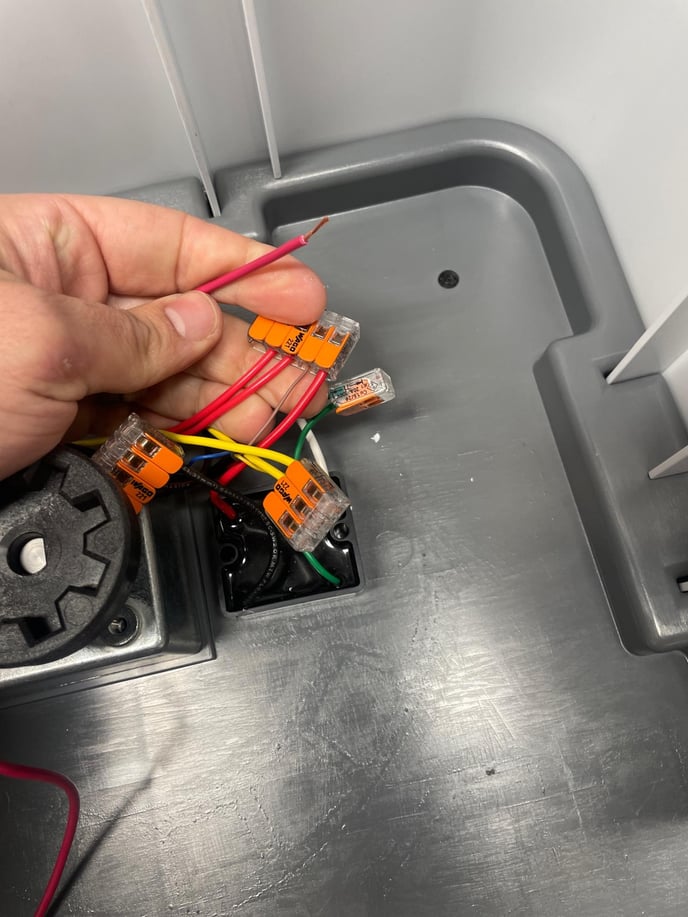
Step 2: Remove the Base Cone Insert
-
Locate and remove the base cone insert on the toilet.
-
If your unit has mount screws, remove those too.
-
Underneath the insert, you’ll find a cluster of wires—this is your access point.
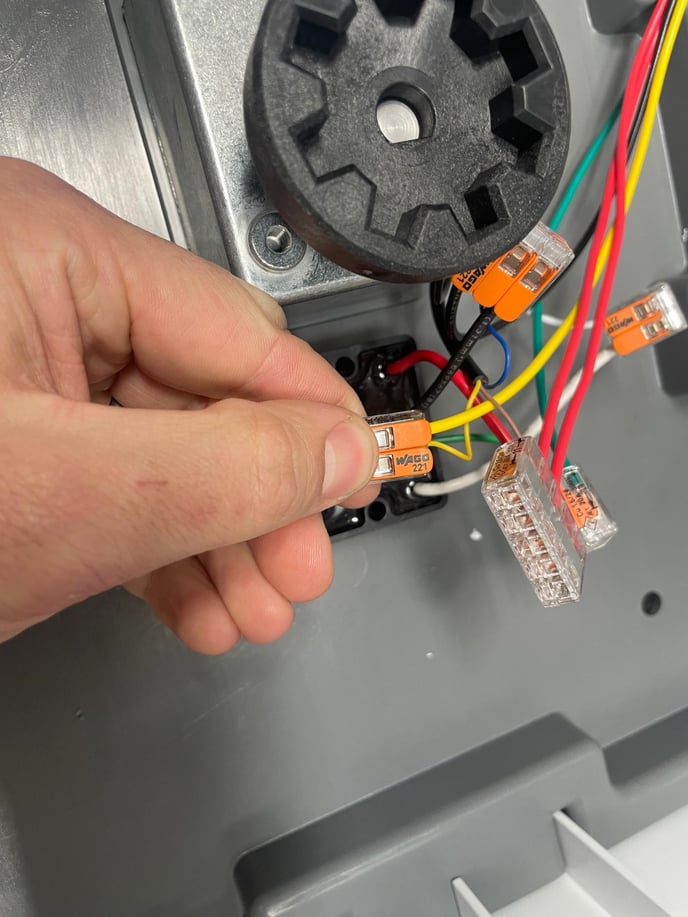
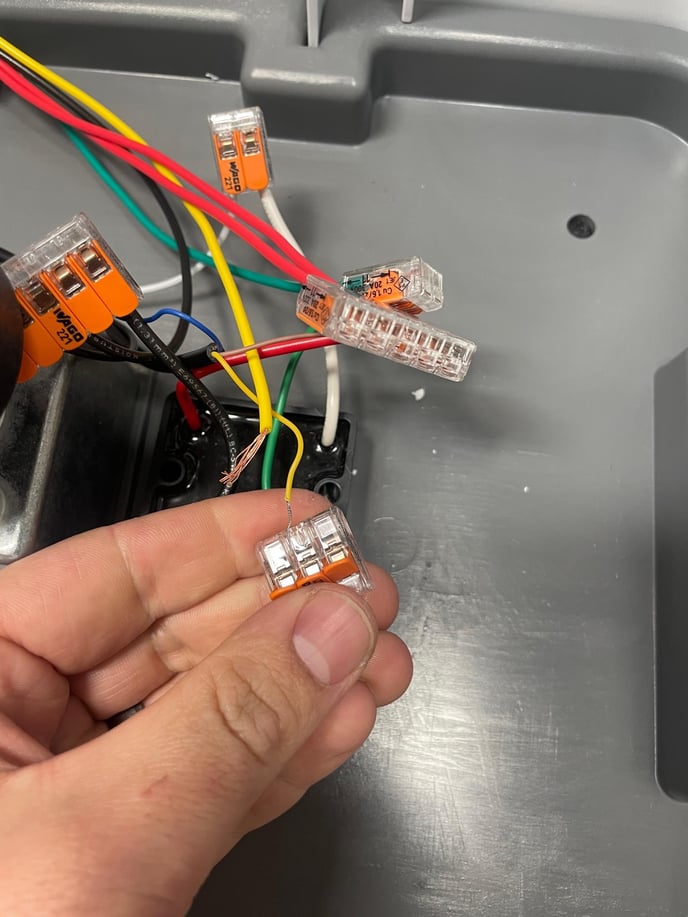
Step 3: Locate the Yellow Wire Cluster
-
Inside the wire cluster, find the two yellow wires joined together—this is your low-voltage trigger line.
-
Use a 3-pin wire connector to replace the existing 2-pin connector (optional but cleaner).
-
Plug the yellow wire from your LED setup into the third port of this connector or WAGO clip.
Step 4: Connect Power to the LED
-
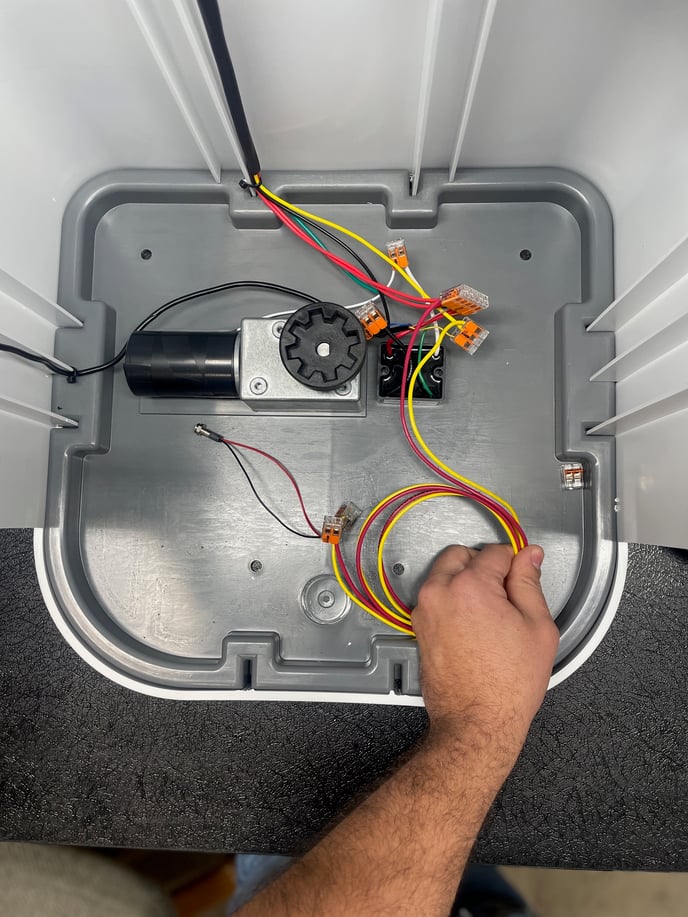
Take the red (positive) wire from your LED and connect it to the 5-pin red wire cluster.
-
This cluster usually has an open slot available—no need to modify anything.
-
You’re now connected to both power and signal.
Step 5: Test Your LED
-
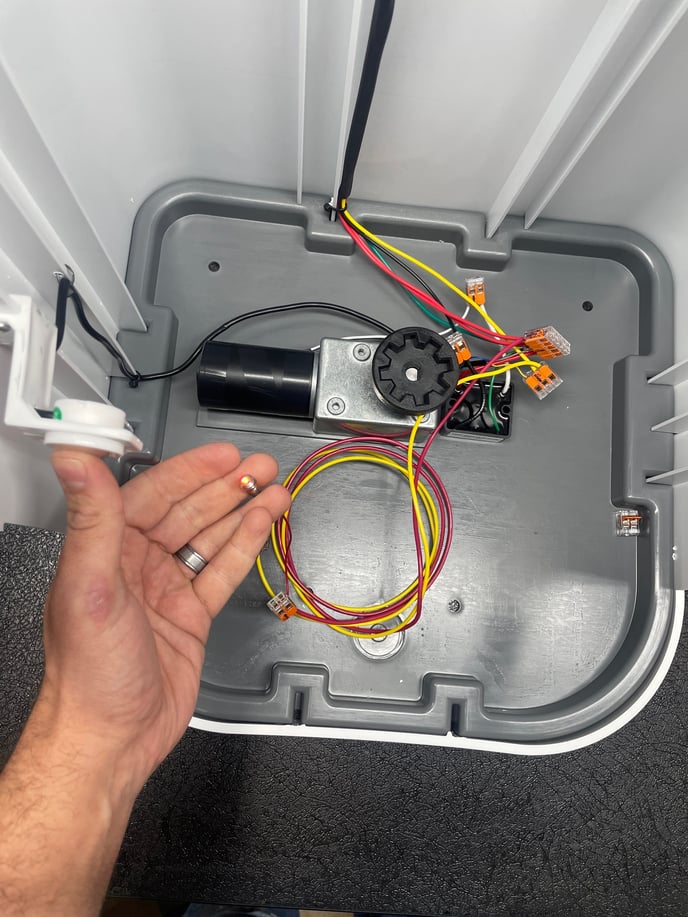
Hold your thumb in front of the urine sensor.
-
Your new LED should light up when the sensor is triggered, and turn off when your thumb is removed.
-
If it doesn’t respond, re-check your connections and polarity.
 Step 6: Reinstall and Route Wires
-
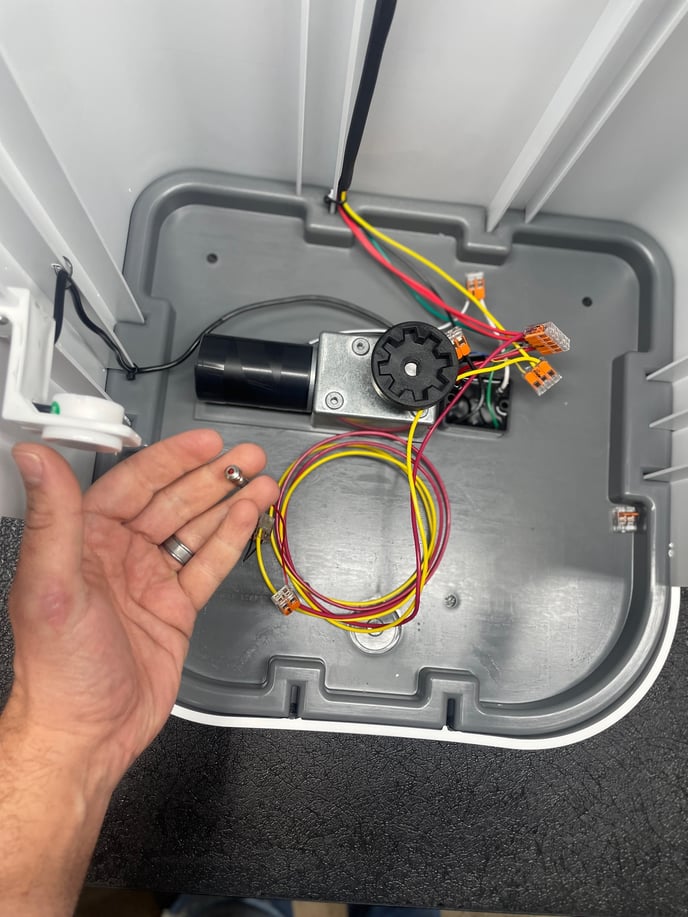
Reinstall the base cone insert.
-
Make sure your wires are routed around the internal ribs to prevent pinching—this keeps the insert flush.
-
Use zip ties to cleanly secure your new wire alongside the existing harness.
Tip: There’s a convenient gap in the back corner of the unit where you can route the wire externally if needed. You can also drill a clean hole in the side panel to mount your LED directly into the plastic housing.
You're All Set
You’ve now added a custom LED light to your OGO™ ORIGIN—and tied it cleanly into the system. Whether it’s for nighttime use or extra style points, your setup just got brighter.
Need help or want to share how you customized your toilet? Reach us at sales@ogotoilet.com.